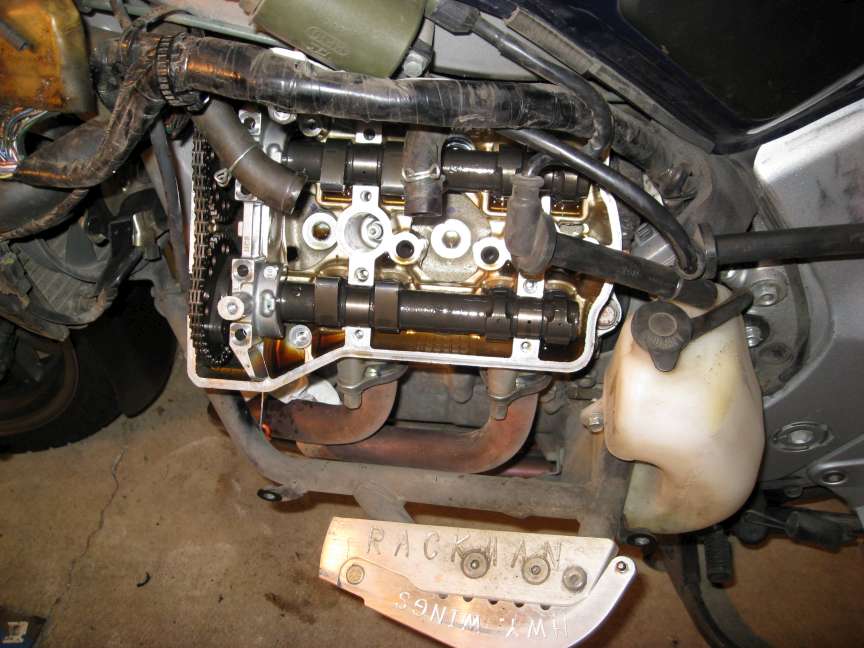
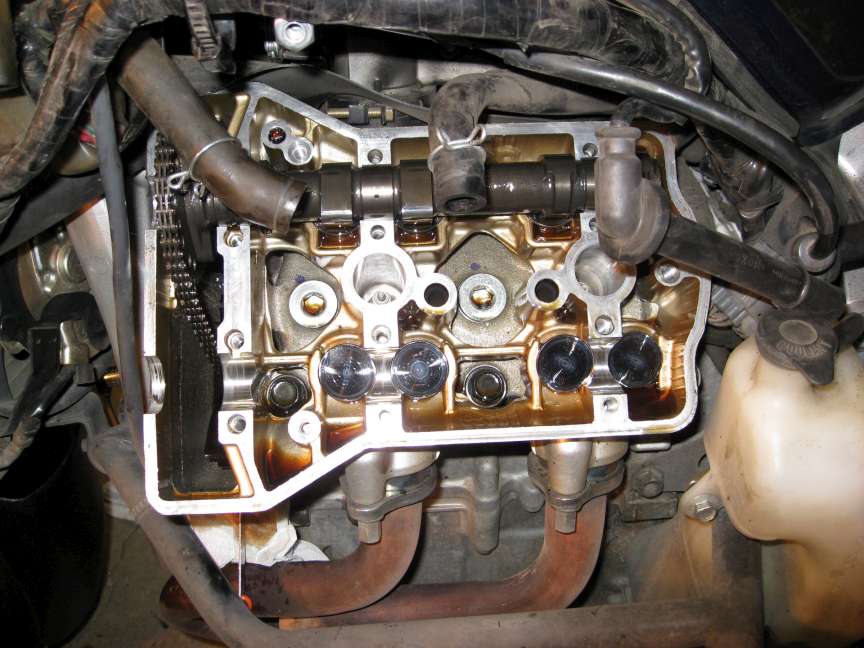
Right hand head with the valve cover removed.
Valve Adjustment Future work (By
Tim Shevlin Anaheim, CA #1183)
The
Shim Calculator Excel Spreadsheet
by Daniel Horton, STOC #1256 . Modified slightly by
Adam Koczarski, STOC #265, for the ST1300. Very nice spreadsheet!!
Update: I
started using Kurt G's version of the spreadsheet. You can get it
here
Right hand head with the valve cover removed.
Two access covers removed.
I had a little trouble getting the exhaust cam back in!? Turns out there was a
kink in the chain effectively shortening it.
After giving it a little yank
and feeling it lengthen everything dropped into place.
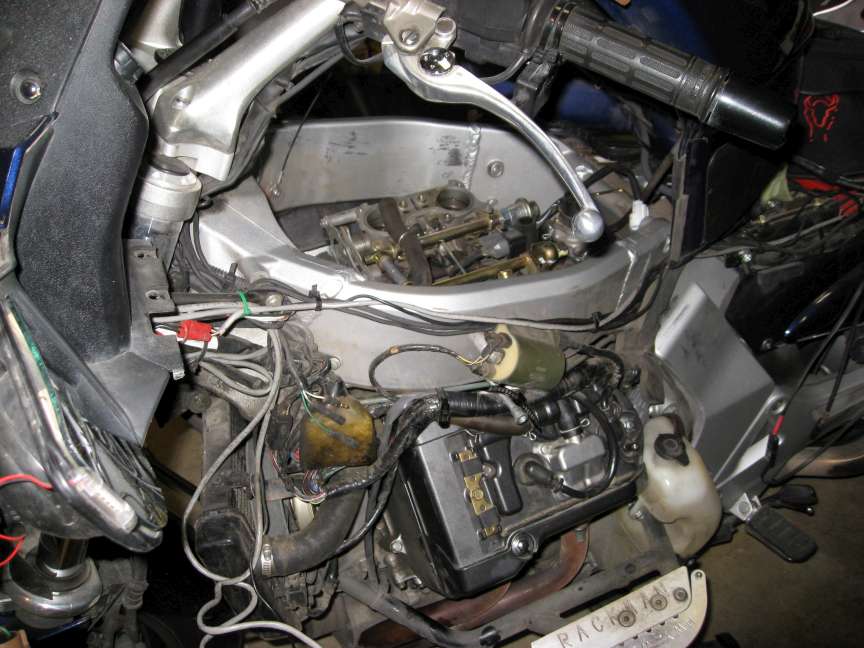
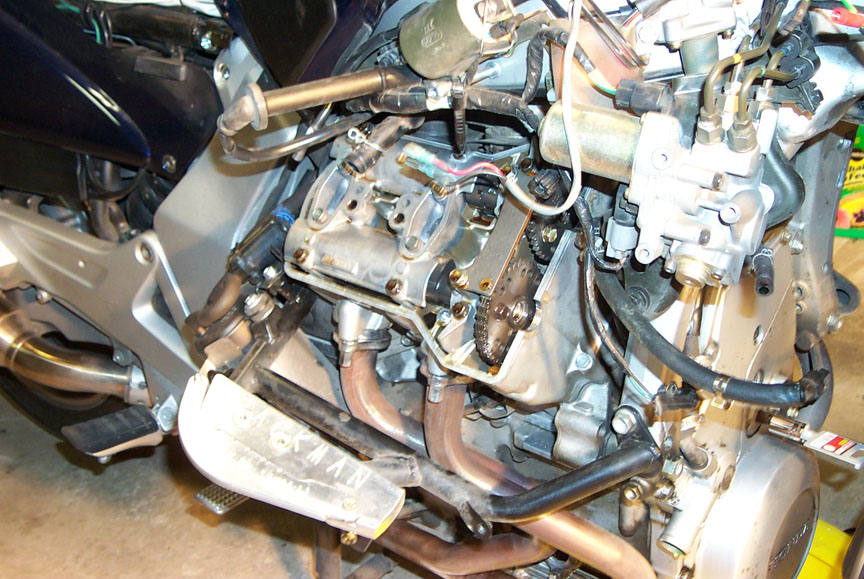
Had to pull the airbox
to get to the right side cam chain tension adjuster.
![]()
Values from my first check on 4/15/2007 at 27,750 miles
![]()
Values from my second check on 4/30/2013 at 72,500 miles, Cylinder #2, exhaust
valve #1
was the first valve I've ever measured to be out of spec. I triple
checked my measurements,
then re-measured after the shim change just to be
sure I wasn't missing something.
Note: The ST1300 engine turns CCW--the reverse of the ST1100 and uses a different range of shim thicknesses.
Recent advice about removing the plastic prior to taking your ST1300 to a dealer for valve adjustment in order to save money sounds like a great idea, but for those wanting to do their own I offer the following tips to supplement procedures contained in the Honda service manual. You will normally need to reset only those valves that are out of tolerance, but I found 3 on on my bike--on opposite sides, of course-- so I chose to record all shims sizes as installed from the factory and to change any where clearance was below the mid- point of the allowable range.
IT IS IMPORTANT that the correct index mark on the crankshaft be lined up perfectly, especially after the cams are removed. A small error there gets magnified at the cam drive gear. You will need a mirror and a good light to set the crank position unless your front wheel and fender are off the bike. Use a non-ratchet wrench to turn the engine accurately.
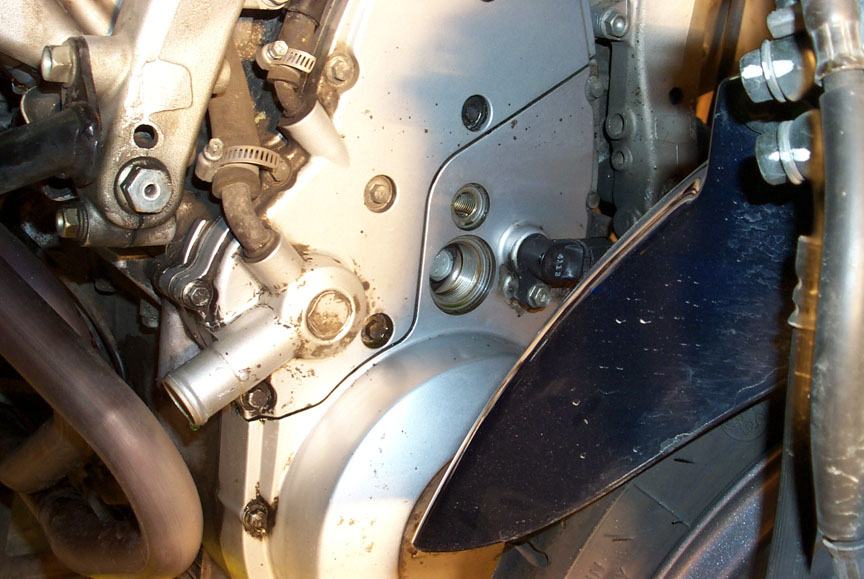
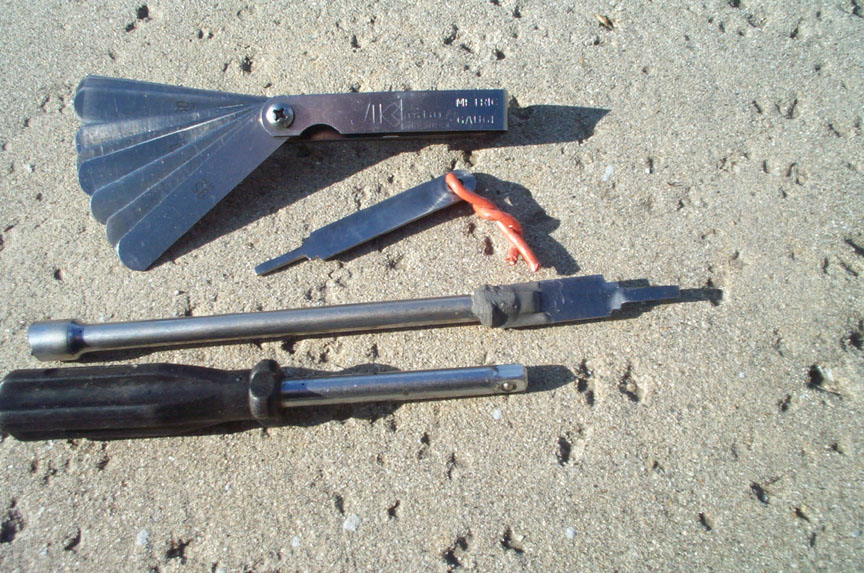
TENSIONERS-- Each bank has a chain tensioner located on the "trailing" (" non-drive") side of the cam gears. This makes access to the LH one a snap and the RH one a real pain if you need to change a shim on that side. The free length of the tensioner plunger is about an inch, requiring about 6 clockwise turns to fully retract, but when tensioning, it's unwound only about one turn, at which point the spring tension felt in the retractor tool is about the same as that in a typical window shade. You can use a small screwdriver blade (pocket size, typically) as a retractor tool but you'll need something to keep it from unwinding as soon as you let go. Another way is to fabricate the tool described in the Honda service manual.
It has a shoulder at the correct depth such that when the retractor is wound tight, (you wind until the tool stops) you simply back off to the nearest 90 degree cut in the retractor housing (visible after the retractor sealing bolt is removed) and push in. Spring tension will hold it in place.
If you have to work on the RH side, practice the above procedure on the LH side first, as you can peer into the cam chain well and watch the retractor bottom as you twist the tool. The retractor housing has three 10 mm bolts, but you need to remove only the middle one to access the adjuster mechanism. If the inserted tool turns freely with no resistance the blade may be too wide or too short to engage the deeply recessed slot, so adjust it accordingly. Wiggle the chain before and after winding in the tensioner, so you'll know how it feels if you need to do the RH side.
On the RH side, the retractor is buried under the thermostat housing, but it can be accessed with patience and a suitable tool extender. You need not remove the throttle bodies per the manual, but instead, after removing the air cleaner housing, tuck the front part of the rubber heat shield out of the way so that you can see the top of the thermostat housing and the middle bolt on the retractor housing below it. The thermostat housing floats on all its connected rubber hoses, so it can be easily pried out of position to clear
slight hose obstructions. Before removing the retractor sealing bolt
tape the 10 mm socket to a 1/4" drive extension to make sure it can't pull apart and drop into the engine well. I also recommend using a skinny stud-shaped magnet/extender tool placed next to the socket to keep the bolt from dropping away after it's fully loosened. (a magnetic socket would sure be nice) The sealing washer under the bolt is aluminum, so the odds of losing it are very high. (when I removed the bolt, the washer remained stuck to the retractor housing, but lacking bubble gum, I tried heavy grease on my magnet tool and lost it anyway) Consider picking up new washers from your dealer before beginning RH cam removal. ( p/n 90442-397-000)
For doing the RH side, I made up a second retractor tool using JB Weld and a modified 1/4" drive extension. A screwdriver-type handle is more than sufficient to apply torque to the retractor and I would avoid using a socket wrench, as you need to be able to feel the retractor spring torque and the point at which the plunger bottoms.
You cannot easily see the RH retractor plunger like you can on the LH, but when the chain feels loose, you're ready for the next step.
CAM REMOVAL-- I marked the chain position before starting, but don't bother, as you need to follow the manual exactly and chain marks are not reliable. DO darken the correct index marks on the cams with a magic marker before beginning work, however. The manual shows which marks show in what position during cam rotation.
I used coat hanger top hooks to keep the chains from falling into the cam wells, but you will need to turn the engine 450 degrees from TDC for RH cam removal. With the LH cams already removed, I slipped a length of 2" PVC pipe under the camless chain to allow it to turn smoothly as the engine is turned. (not in the manual, but it seemed like a good idea) Note: there is a good reason to follow the factory procedure. When you do, the cams have little or no tension against the valve springs, making for very little movement when the holders are released and for easier cam indexing, etc. on reinstallation.
SHIM CHANGE-- Be sure to plug all holes in the head before pulling any cam followers. Use a small, sturdy magnet to withdraw the followers. The shims usually stay stuck to the underside, but if disturbed they don't stick so well and fishing one out of the crankcase is no fun.
CAM INSTALLATION-- For either side, with the correct index mark on the crankshaft lined up perfectly, position and index the drive-side cam first, ( the non-tensioner side) after removing all slack from that side of the chain. Then, with all slack removed in the chain segment between the two cam gears, index the other cam and snug down the holder bolts in a criss-cross pattern per the manual. Release the tensioner tool and re-check the index marks BEFORE turning the engine. Note: if you miss by a single tooth, the engine can get stuck when turned due to interference. If this happens, release the cam holder bolts evenly a few turns to relieve the interference then start over.
COMPLETION-- When reinstalling the RH tensioner sealing bolt, to avoid losing parts I affixed the aluminum washer to the bolt flange with Permatex #2, then wrapped a hoop of electrical tape around washer, bolt and socket and trimmed the tape with a razor blade so that none of the tape could fold under the washer sealing surface.
The bolt initially would not center on the retractor threads without cocking until I nudged an interfering hose on the thermostat housing out of the way. You REALLY do not want to cross-thread this bolt.
Recheck index marks and record finished valve clearances, etc. for future reference.
My two retractor tools are available for loan, but they're easy to make. I used the 1 mm shims from my feeler gage sets and sized them using a cutoff wheel as a grinder.
Tim Shevlin Anaheim, CA #1183
Return to ST1300 Farkels page.
Return to Motorcycle links page.