RX-8 Third Brake Light 1/7/2006

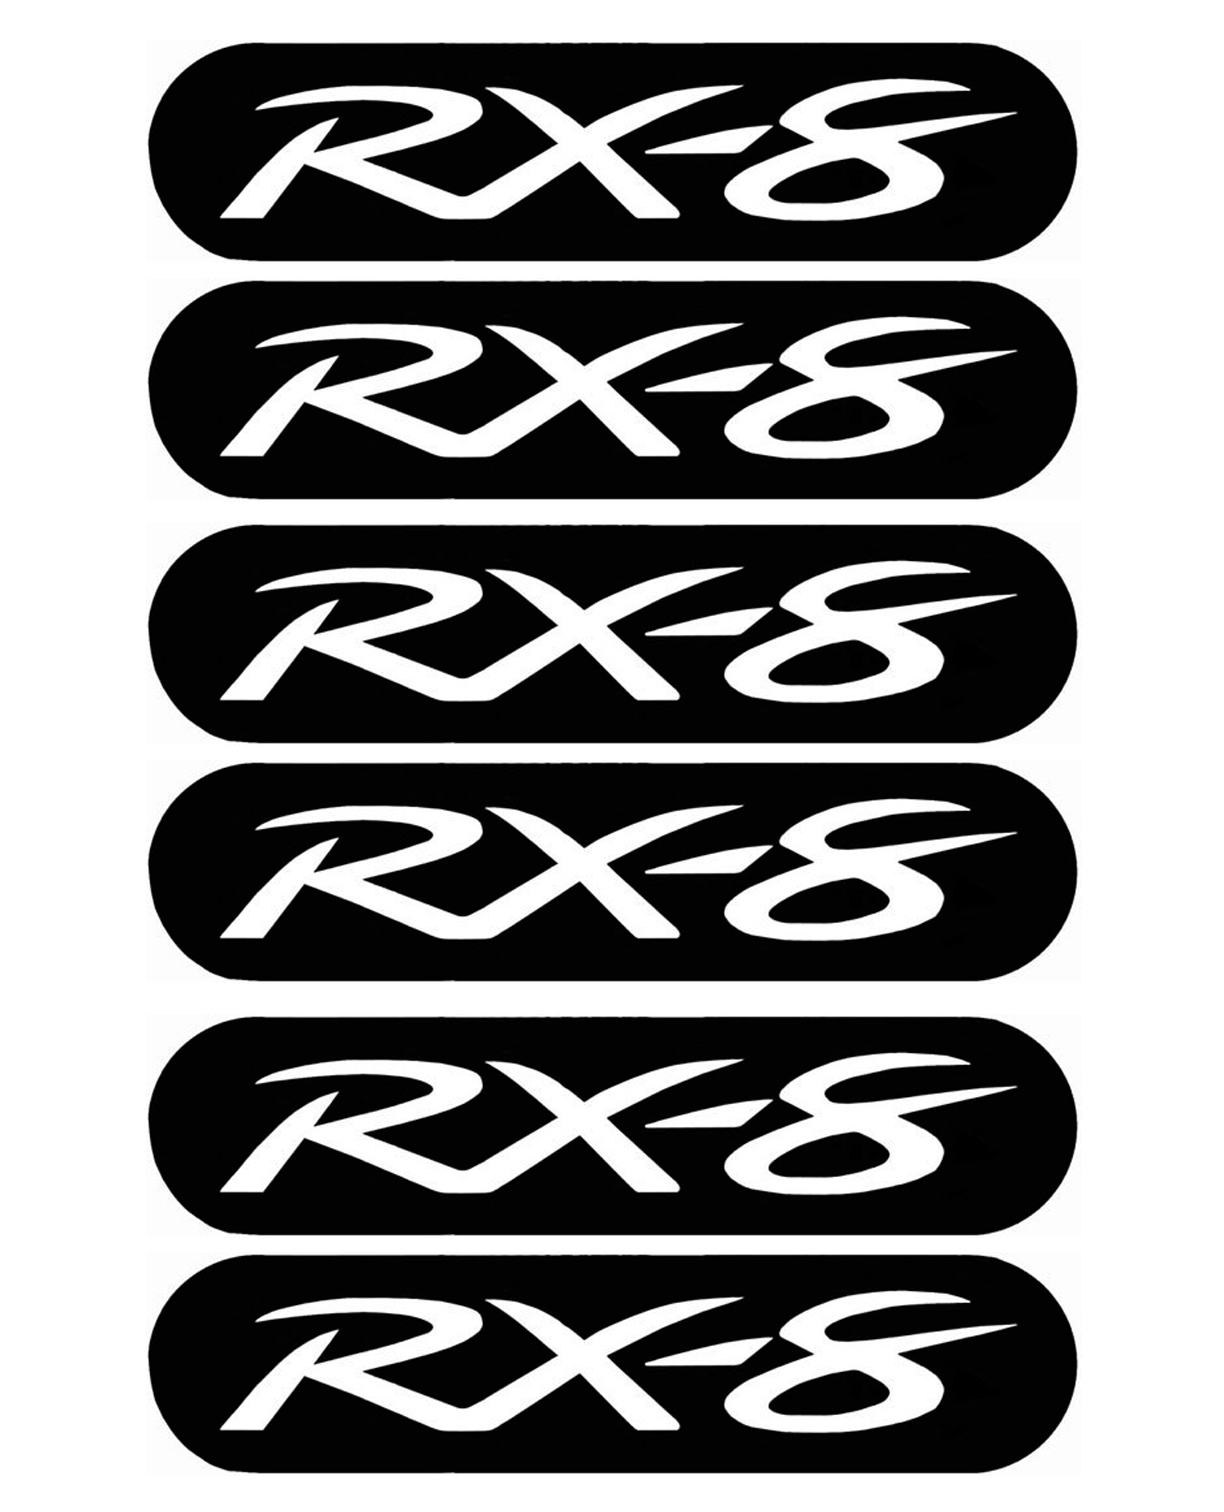
Here's the pattern for the modification. Pertinent
thread at the 'Club'
here. I used Photoshop to
create an 8.5 x 11" version of
this with a page full of the logos. You can get
it here. The versions of the graphic on
this page are bigger than the first set I had
posted here. They need to print approximately 6" long to fit properly.
I've also printed a few sheets of these on thick
transparency paper. If you send me a self addressed
stamped envelope I'll send you one for free!
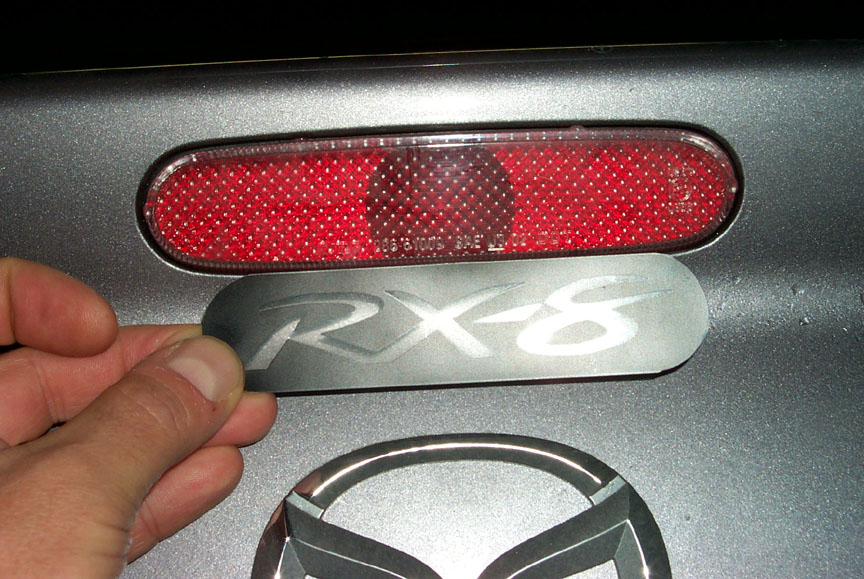
Here's what you're trying to install in there. I
ended up stacking two of these together to get the black dark enough to
suite my tastes. This is a picture of the small version that I have since
replaced.
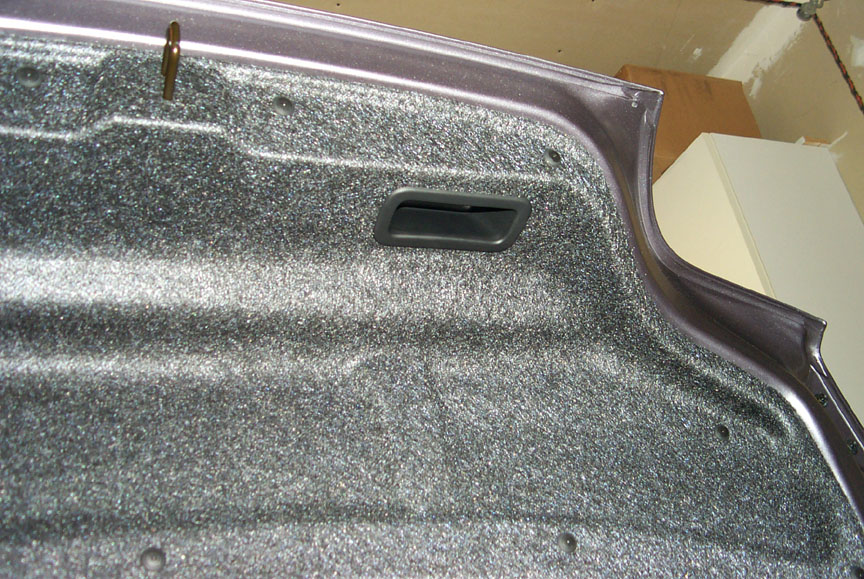
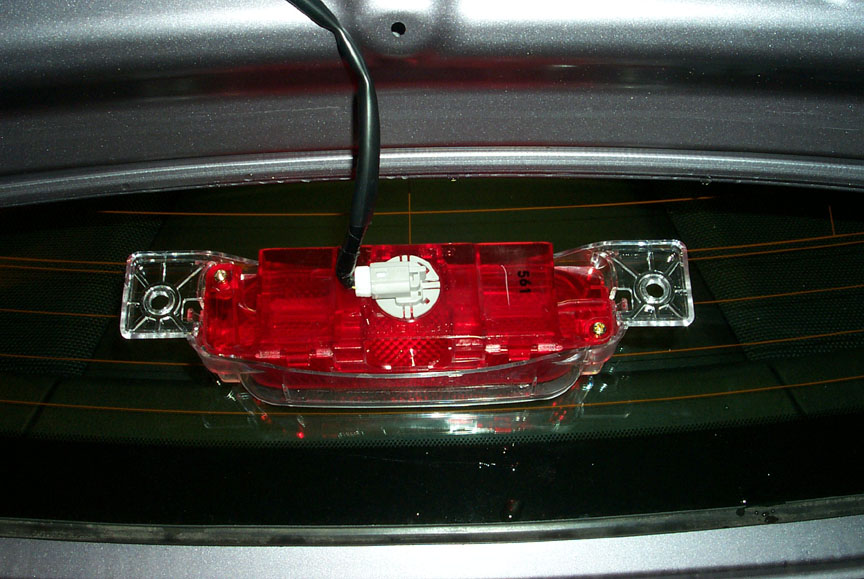
You need to remove 11 screws and the handle shown to
pull the liner. It took a fare amount of tugging to get it out.
Liner removed.
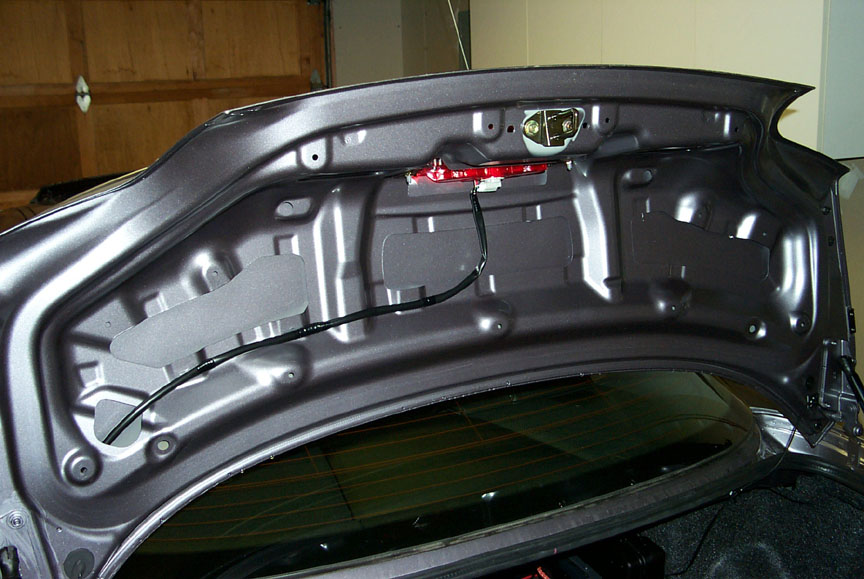
Remove the two bolts, then push on the lense from the
other side while rocking the assembly to get it out.
Next remove the two screws.
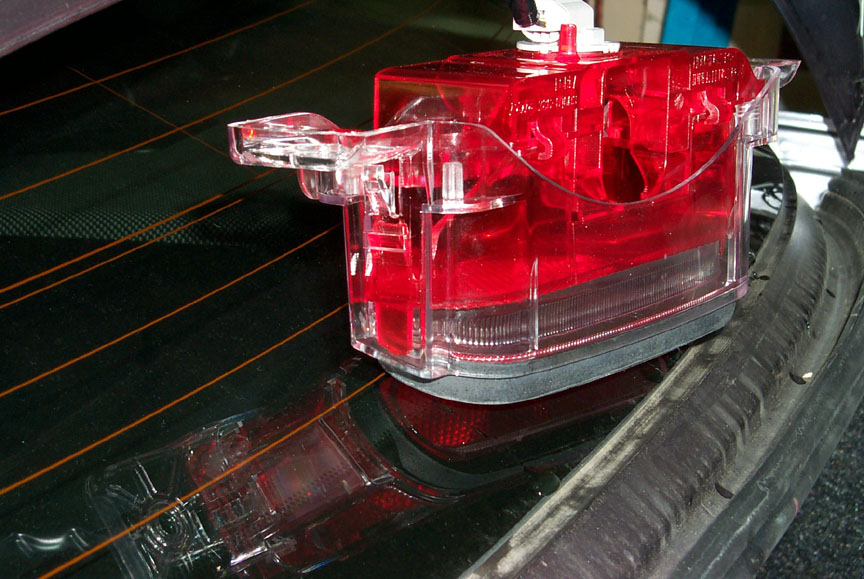
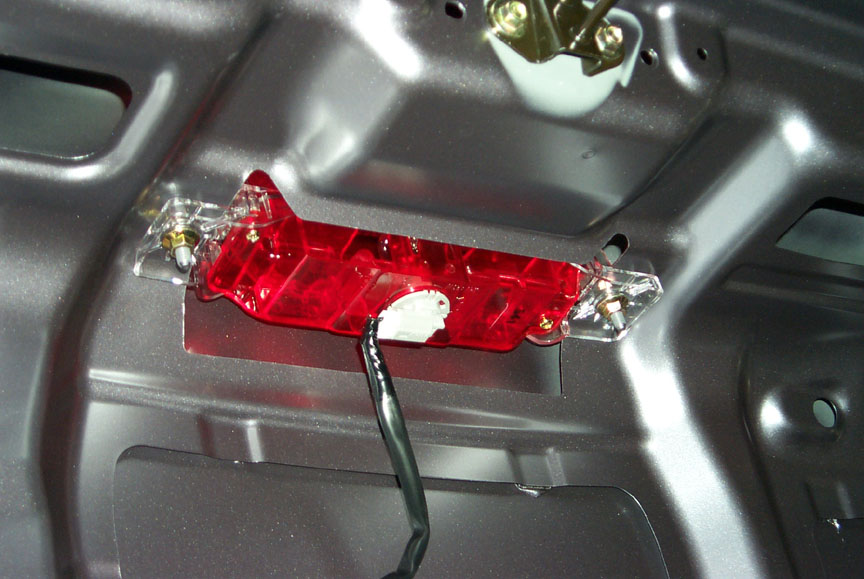
Push on the red releases, one on each end, to
separate the two halves of the assembly.
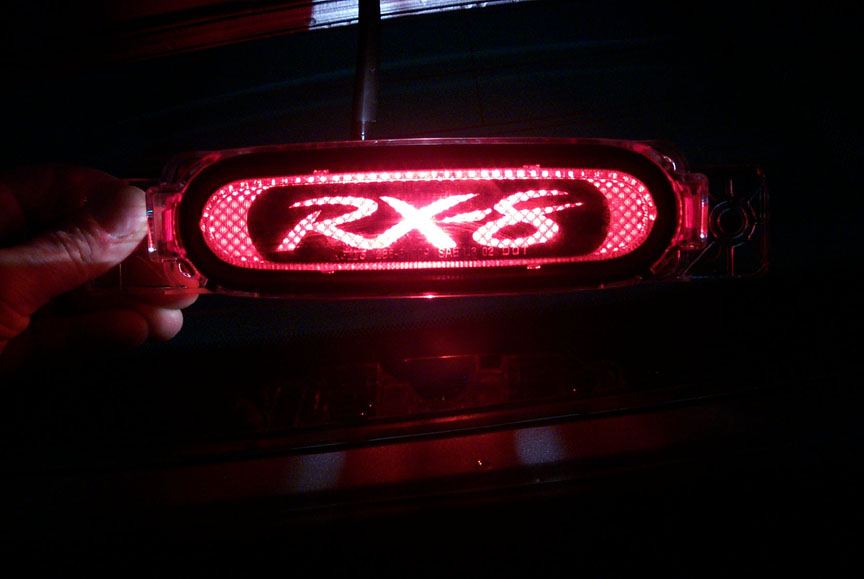
Tape the pattern in place and re-assemble to see if
you have it centered. I just used 3 pieces of scotch tape to attach it.
This again is the smaller version.
Put everything back together and this is what you
get! This shows the small version.
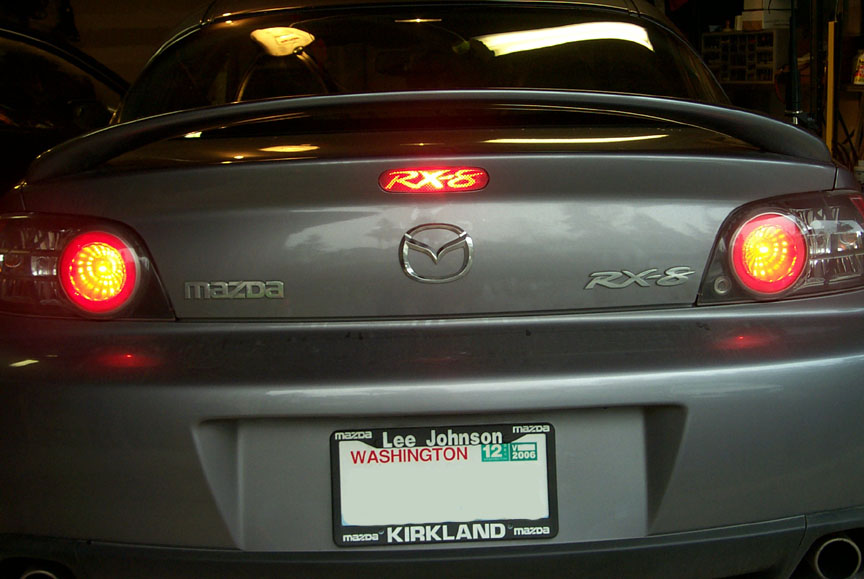
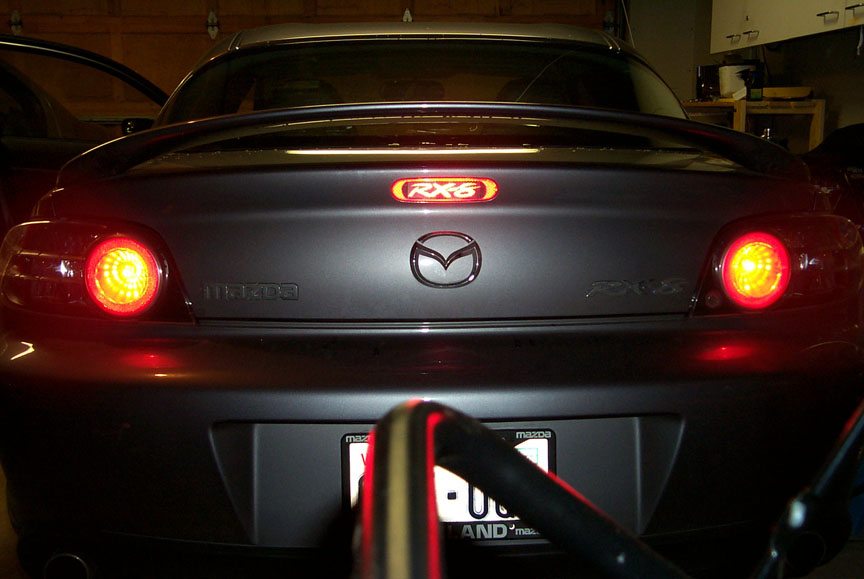
Here's the larger version. It fills the lens nicely!!
Return to RX8 Modifications page.
Return to Adam's Mazda RX8 page.